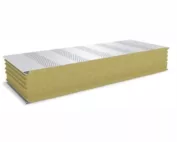
Sandwich panels
Cleaning a barn ceiling after the lights have been replaced: where should the crew stop?
Replacing the lights in a barn can leave marks from old brackets alongside new cable entries in the ceiling. Not every mark seen from below is dirt that should be washed off. Before the cleaning crew starts, walk through the altered areas with the installer. Agree where the lining can be cleaned according to its care instructions, what must be left out and who will check the old holes. The rest of the ceiling can then be included in the brief without assuming that a new light fitting and the point where its cable enters the ceiling can be cleaned in the same way.
Map the old and new fixing points
Mark the rows of lights and the entrance on a sketch of the room. “Second light from the door, row nearest the wall” is easier to locate on site than a photograph number alone.
If a bracket was moved, photograph both positions. From the floor, the outline of an old base can resemble an unclosed hole. The former may be a cosmetic mark; the latter needs checking before cleaning.
Treat the lining, light fitting and cable entry separately
Check the care documents for the exposed facing rather than relying on the name of the insulation core. If a section of panel was replaced during the work, compare its product reference with that of the adjoining panels.
The fitting instructions cover the light itself. They do not tell you how the ceiling penetration was finished or whether the seal is continuous at the trim. Mark those details as separate items on the sketch.
What does the installer need to decide?
Ask the person responsible for the installation to identify which locations are suitable for the planned cleaning method and which require inspection. Knowing that the lights are new or intended for barns does not establish how the installed connections may be cleaned.
If equipment needs to be isolated or protected, have a qualified person arrange it. The cleaning crew should not open a housing or remove a seal to reach a dirty patch.
How do you show the crew where to stop?
Before work begins, show the contractor one section cleared for cleaning and one that is excluded. Do not prescribe an arbitrary radius around each lamp. Mark the boundary using the actual cable route and the installer’s assessment.
Agree how the ceiling will be reached from inside the room. If the rear edge of a fitting is hidden from the agreed work position, record it as uninspected. Do not use the ceiling lining as a work platform.
Choose a trial area away from the fittings
Test the agreed cleaning method on a representative patch of facing clear of the fittings. Use a product suitable for that surface and follow its directions. A successful trial in the middle of a panel does not authorise spraying into a cable entry.
If the outline of the old light remains, compare it with the photograph taken before cleaning. Before changing the pressure or cleaner concentration, establish whether the mark is residue, a colour difference or damage to the finish.
Inspect the ceiling again when dry
At handover, return to the same marked positions. Record the cleaned facing, pre-existing marks and any fresh runs near penetrations separately. A photograph alone cannot establish the source of moisture.
Keep a short list of the areas left for maintenance. Once a defect has been addressed, add the date and agree the cleaning scope for that section again. A different cleaning crew will then know why the area was previously left out.
7 branches. Materials closer to your project.