Sandwich panels
Damaged sandwich panel at a loading bay. What to check before ordering a replacement
After an impact at a loading bay, it is easy to order a panel of the same thickness and a similar colour. The harder part is finding one that joins the adjacent panels and can be installed beside a working bay. Start by establishing the extent of the damage and identifying the existing system. Collect photographs, cover width, joint details and information about access to the fixings. An inspection will help the contractor decide whether a skin repair is sufficient or a whole wall section needs replacing.
Record the location and size of the impact
Give the bay number and the position of the damage relative to the floor and nearest joint so the crew can identify the panel.
Take a photograph of the full bay and a close-up with a scale. Document any distortion or opening visible from inside. Note whether the mark ends within the skin or reaches a visible fastener or edge.
Identify the installed panel
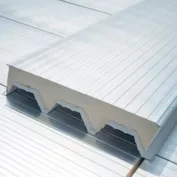
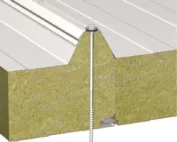
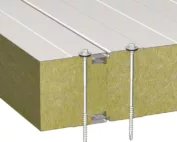
Find the original panel schedule or as-built records. Note the manufacturer, range, core, skin profile and fixing method. A reference for the joint version supplied in the year of construction is particularly valuable.
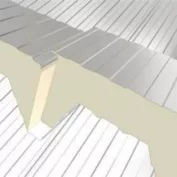
Measure between repeating joints to compare the installed cover width with the quotation. The overall width of a loose panel may include a section concealed in the assembled joint.
Check the adjacent joints
Inspect both adjacent joints, the base flashing and the fixings. An impact near an edge may affect the fit of the next panel. Include the support at that point in the inspection.
Ask for confirmation that the proposed panel joint is compatible with the existing system. For a discontinued range, obtain edge sections or supplier samples. A matching RAL colour tells you nothing about the joint fit.
Plan access at the loading bay
Mark barriers, door guides and equipment behind the wall on a sketch. The contractor needs room to reach the work, remove trims and manoeuvre the full element.
For concealed fixings, request the removal and reinstatement sequence. Agree with warehouse staff which bays need clearing and how goods will be protected while the envelope is open.
Compare the scope of repair quotes
For a local repair quote, clarify the treatment proposed for the coating and any exposed edge. For replacement, specify the full panel reference, trims and how seals will be reinstated.
Compare bay downtime and any need to move racking. Two quotes covering the same wall area may include different amounts of internal work. Clarify this before reserving the shutdown period.
Inspect the repaired detail
At acceptance, compare the new joints with the detail agreed in the order. Inspect the skin edges and base flashing at the former impact point. Record the replacement panel batch as well.
Keep photographs of both sides and a record of the components actually replaced. If vehicles still pass close to the corner, discuss the traffic path or barrier position with the loading bay manager.
7 branches. Materials closer to your project.