PIR insulation
Internal insulation for a new house on the plot boundary
For a wall close to the plot boundary, every centimetre counts, but a thin insulation layer is only part of the decision. The permissible building layout, fire protection and the behaviour of the wall after internal insulation must all be taken into account. The best moment for these decisions comes before choosing the construction and routing the services. The building’s position and the wall detail at the boundary require an assessment of the design. Internal insulation does not settle the question of permissible location, openings or the relationship with the neighbouring structure. It also does not give the right to extend flashings, foundations or insulation beyond the land at your disposal.
First check the conditions for the whole wall
The architect should consider the fire requirements and the available structural solutions. The fire reaction class of the insulation does not replace the fire resistance of the wall. If a specific protective system is required, its layers cannot be removed independently to recover a few centimetres of room. Geometry and safety must be agreed together.
Calculate the total lost width
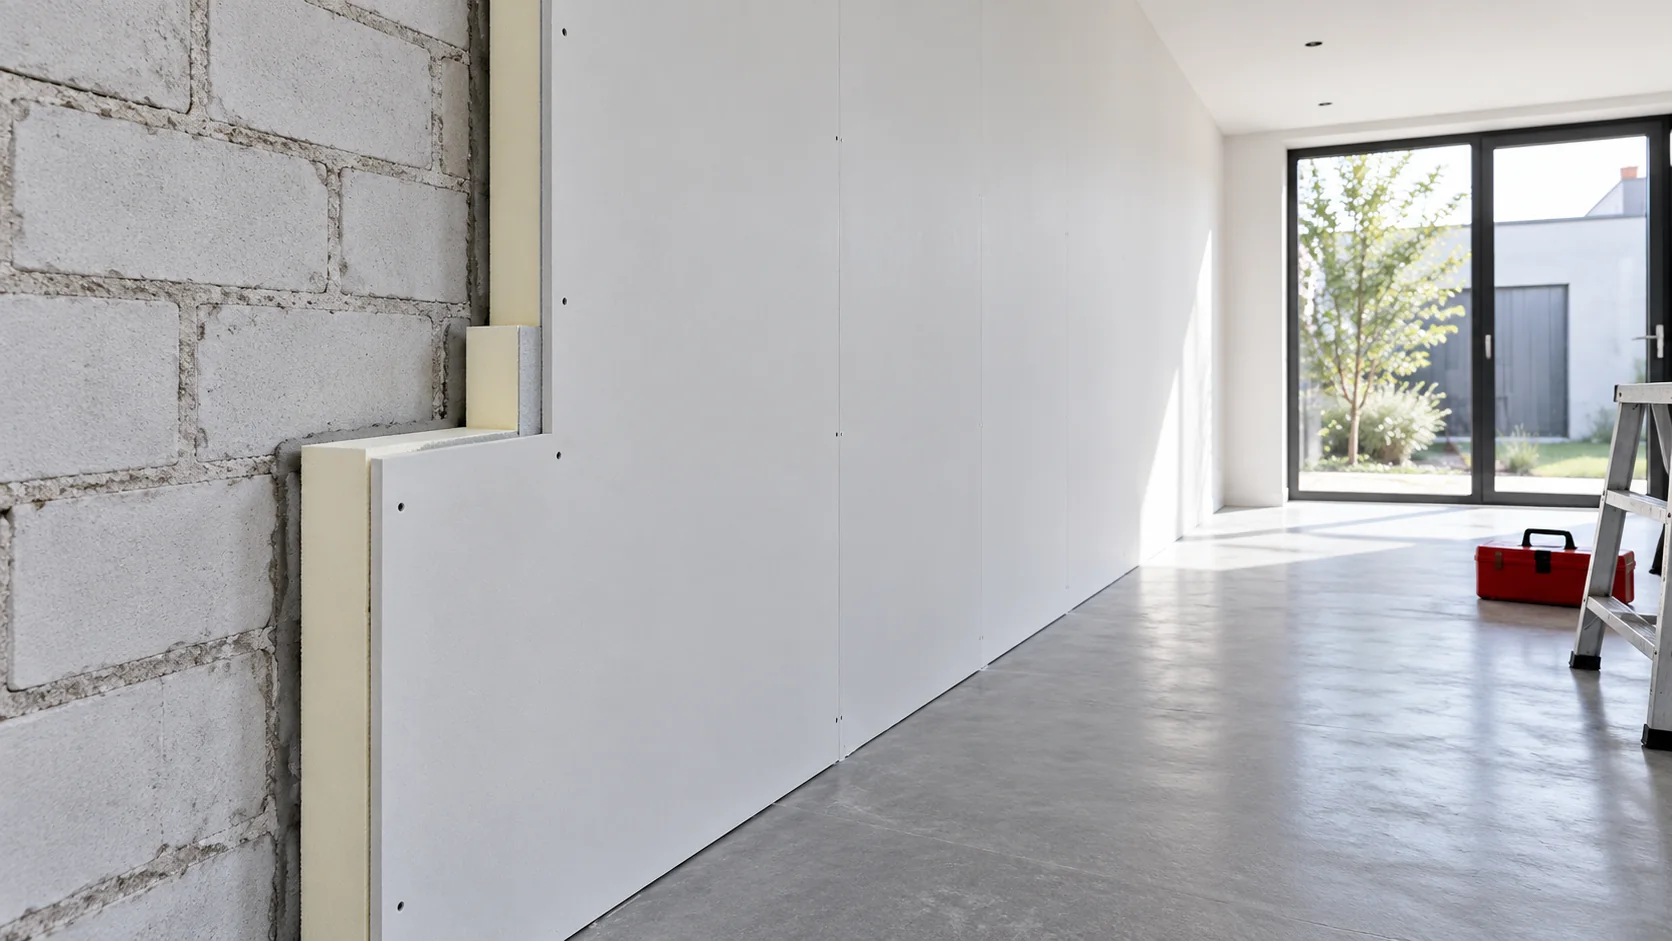
PIR thickness is increased by adhesive or framing, cladding, substrate tolerances and the finishing layer. For example, 70 mm of composite insulation with a 12.5 mm plasterboard already gives 82.5 mm before accounting for the fixing method. The core dimension is not the dimension of the finished build-up.
For a 9 m long wall, every additional 10 mm of build-up occupies approximately 0.09 m² in plan. This is a simple geometric calculation, not a measure of the solution’s cost-effectiveness. Preserving a few centimetres matters at a passage, stairs or fitted furniture. It is worth comparing them with the possibility of improving the room layout before the structure fixes it.
Check how the wall will dry out
Insulation on the room side limits heat supply to the masonry in winter. A vapour-tight cladding can additionally restrict drying to the interior. The design therefore needs data on the external finish, rain exposure and construction moisture. A ‘thin board’ does not mean a small impact on the moisture balance.
In a new building, protection of the masonry from precipitation and an appropriate work schedule can be planned. It should not be assumed that neighbouring buildings will always protect the façade. Their existence and geometry can change the service conditions. The analysis should correspond to what is actually provided for in the design, including the period between investment stages.
Run the airtightness without bypassing the floors
The wall meets the floor, ceiling and cross walls. At each of these locations, the insulation layer and the air flow control must be connected. An accidental gap behind the build-up can lead moist air to the cooler masonry. Sealing the joints in the middle of the field alone does not close the perimeter.
The ceiling and cross-wall detail requires checking for thermal bridges. It is not always possible to achieve a perfectly continuous layer, but the effects of a break can be assessed and limited. The upstand of the insulation, the geometry of the covering and the method of fixing should be shown on the drawing. The contractor should not select their width on site based on the available space.

Prepare the space for services and equipment
The layout of sockets, pipes and fixing points should be established before the wall is closed. A box recessed into the insulation can interrupt its continuity and the airtight layer. A separate installation void makes execution easier but takes up additional width. This compromise must be taken into account in the dimensional balance of the room.
Heavy cabinets, handrails or appliances require a secure substrate and a suitable fastener. Foam does not replace a load-bearing structure. The points where penetrations pass through the cladding can also affect the fire protection classification. It is worth gathering them in a single specification instead of leaving each crew to devise its own method of penetrating the finished partition.
Approve the layers before purchase
To place an order, a cross-section of the finished wall is required, specifying the insulation, claddings, fixing and seals. The designer compares thermal, moisture and fire variants. The U-value target is set for the specific project; the minimum available material thickness is not a design target.
On site, the condition of the substrate and readiness for covering are confirmed first. Then the first section, including the corner and the connection to the ceiling, is checked. Photographs taken before the final covering is installed help maintain control over the continuity of the layers. This means that later furniture installation does not have to involve guessing what is beneath the surface.
Questions and answers
Can PIR be counted as a fire separation wall?
Not on the basis of the core name. The required function must be met by a partition designed and appropriately classified in the specific assembly.
Does 70 mm PIR mean the wall is set back by 7 cm?
No. The cladding, the method of fixing, the finish and tolerances must be added. An installation void may increase the dimension further.
7 branches. Materials closer to your project.