Roofs and details
How to detail a chimney flashing on a trapezoidal steel roof
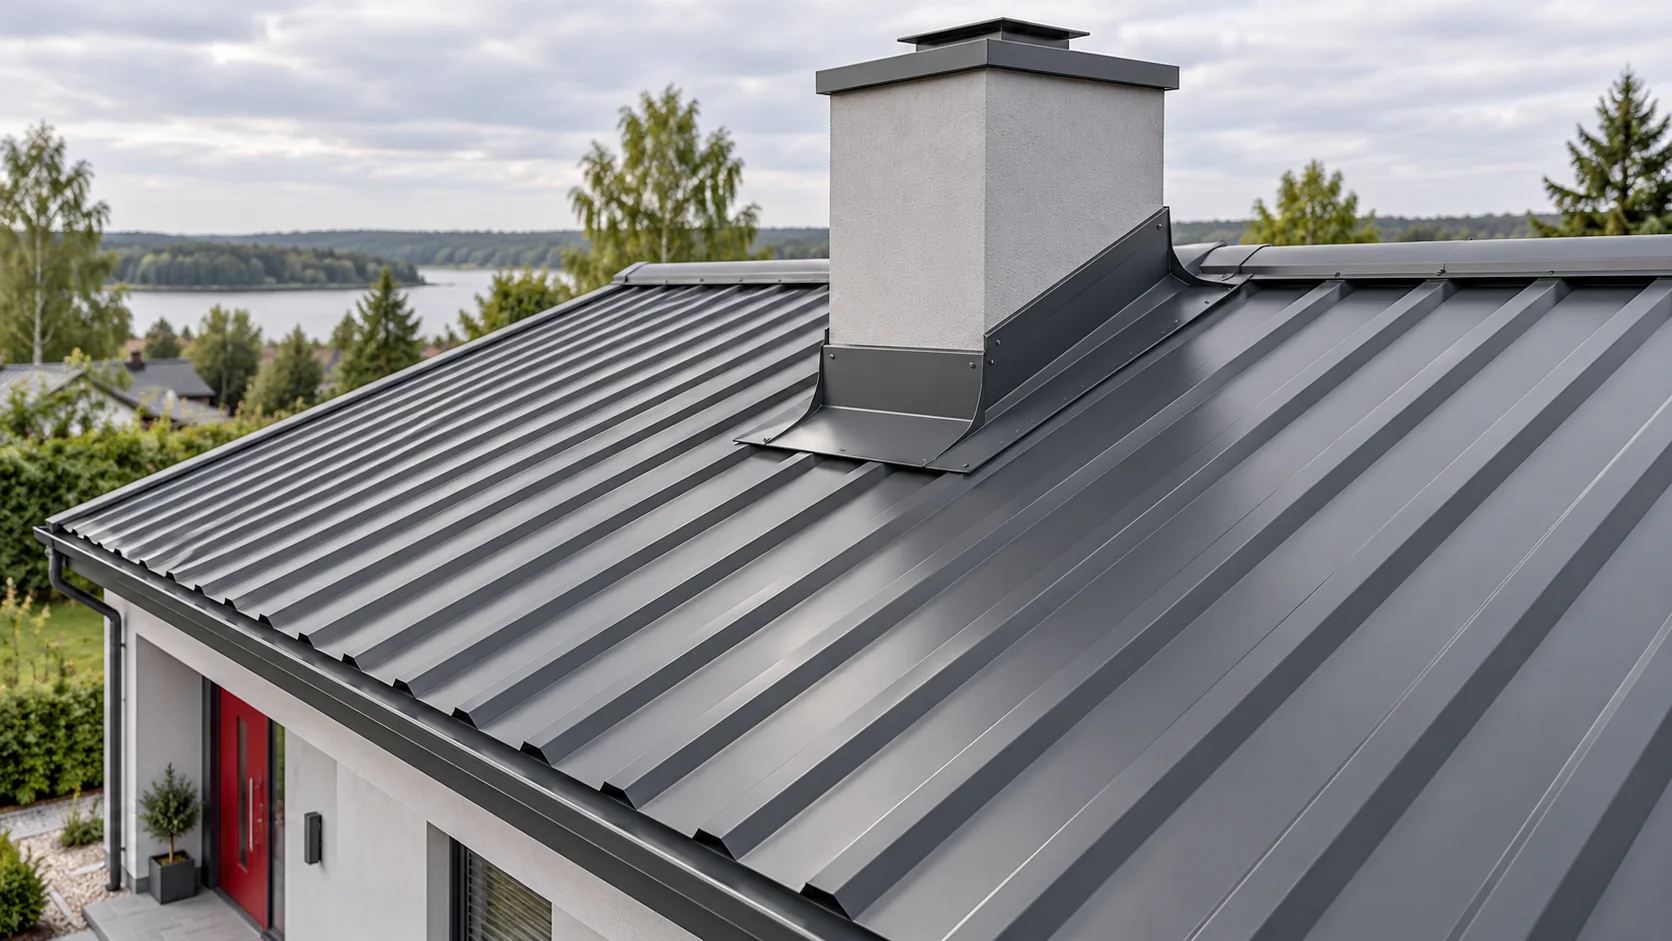
The chimney flashing must take up the water running down the roof slope and direct it past the obstruction. It must also work together with the layer beneath the covering and with roof movement. That is why you do not start by choosing a sealant. First you need to establish the chimney’s position, the shape of the sheet and how the top edge of the flashings at its walls is closed. Measure the chimney and its distance from the ridge. Check where the valleys and the crests of the trapezoidal profile fall relative to its sides. The roof area above the chimney is also important. The more water flows to its rear wall, the more carefully its division to the sides must be planned. A wide obstruction is not automatically handled with the same detail as a narrow one.
Where do you start preparing the detail?
Establish the type of chimney wall and the permissible method of fixing the flashing. Not every enclosure may be cut or drilled at any point. The required clearances from temperature-sensitive components are also needed. The metal apron alone does not resolve the safety conditions of the chimney passing through the roof structure and insulation.
What should be done before laying the sheet?
First, the layers beneath the covering are prepared. The membrane or other specified material must be correctly brought up to the penetration. Water from this plane should bypass the chimney and drain away. The upstands, corners and connections are made with materials suited to the given system.
This is a good moment for photographs. Once the sheets and flashings are in place, most of these areas will become invisible. Also check the support of the sheet edges and finishing elements. If a section of the substructure needs to be added, it is easier to do now. Do not fill the missing support with foam. The apron and fasteners need a stable substrate as specified in the design.
What role does the flashing on the eaves side play?
The lower part of the flashing collects water running down the front face of the chimney and from the side flashings. It must discharge this onto the outer side of the covering. Its shape depends on the height and the rhythm of the trapezoidal profile. It is not enough to cut a flat rectangle and press it firmly with screws into every rib.
The edges must be formed so that the element retains its rigidity and directs water in the intended direction. The connections to the sides should work in accordance with the direction of flow. The length of the run-out onto the roof slope and the method of sealing depend on the chosen solution. Accidental holes in the lower-lying parts can become points of leakage.
How do you route water along the sides and behind the chimney?
The side flashings connect the lower apron with the rear section. They must accommodate the sheet ribs and leave a drainage path. If the chimney edge falls at an unfavourable point in the profile, appropriate widening or adjustment of the sheet is required. Such a clash is better not discovered after the entire roof slope has been screwed down.
Behind the chimney, water must not form a closed pocket. In some solutions, a chimney close to the ridge is connected to it with a longer apron. In others, the rear flashing goes under the covering laid above. The choice depends on the roof geometry. These variants are not interchangeable without checking. Particular care must be taken at the corners where different flow directions meet.

How do you seal the junction with the chimney and allow for movement?
The roof and chimney can move relative to each other. Metal changes length with temperature, and the structure has its own deformations. The solution should account for these movements. Among other things, flashings consisting of a part connected to the roof slope and a part shielding on the chimney side are used. The specific arrangement must be matched to the materials.
The upper edge of the flashing is to stop water running down the wall. It may require a strip, a suitable fold-up or another detail intended for the chimney. Sealant completes the joint. It should not be the only barrier where the sheet metal stands away from the wall. Its type must suit the coating, the substrate and the operating temperature.
What should you check before closing out the works?
Inspect the four sides of the chimney and the drainage path above and below it with the contractor. Check that there are no filings, offcuts or pieces of packaging anywhere. Establish whether the fixings have landed in places not intended for the given detail. The connections of the layers under the sheet metal are also assessed from photos taken at an earlier stage.
The finished flashing should be accessible for later inspection. If the chimney requires servicing, plan suitable roof access. Do not mount steps or a platform on random sections of the apron. At acceptance, what counts is the interaction of the entire penetration: the chimney, the structure, the insulation, the underlay and the external flashing. An even sheet metal colour alone does not confirm tightness.
Questions and answers
Does every chimney flashing have to be inserted into a groove?
No. The method of closing depends on the chimney construction and the chosen detail. A groove is one solution, but it must not be made arbitrarily in every enclosure.
Does chimney tape replace all aprons?
Not automatically. It may be part of a specific system that requires a suitable substrate, forming, pressure and closing of the upper edge.
7 branches. Materials closer to your project.